Expert’s Corner: How to Create Pride Rainbow Eyeshadow Look
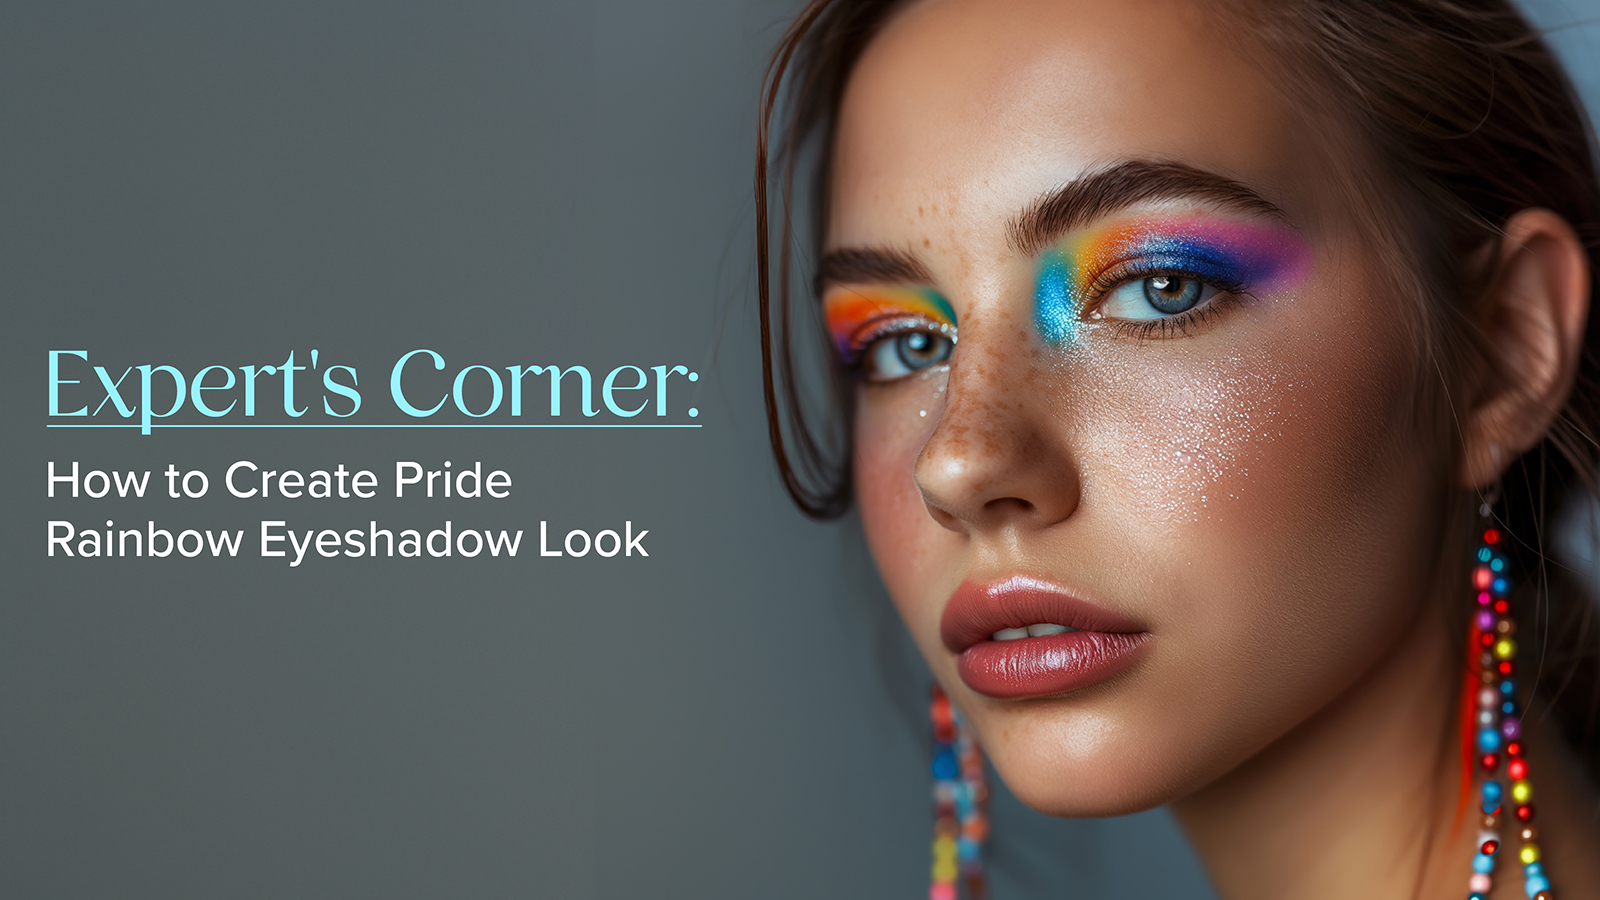
Over the years, makeup has become an essential tool for self-expression and embracing one’s identity. Pride is no exception. One effortless way to show support and celebrate the LGBTQIA+ community is through beauty — specifically, with hair and makeup looks that honour the colours of the Pride flag. June is officially recognised as Pride Month, and what better way to celebrate than with a bold, colourful eyeshadow look that embodies the spirit of love and inclusivity?
Below is a detailed step-by-step guide to help you paint the town in rainbow colours, with an eyeshadow look as vibrant as your Pride spirit!
Step 1: Prep and Prime
Prepping your eyelids is crucial for creating the perfect eyeshadow base for your Pride look. Start off by applying a primer to your lids. This creates a smooth base, ensuring the colour pigment stays put and looks their best throughout the day. Squeeze a small amount of concealer onto your ring finger, then gently dab it onto your eyelids until it blends out smoothly. With a well-prepped canvas, your rainbow eyeshadow will pop instantly.
Step 2: Start with the Base Colours
Begin with the base colours by selecting a bright red from your favourite palette. Grab a round shader brush like Uroparis 103 or 106 brushes and apply it to the inner corner of your eye, blending gently to avoid harsh lines. Aim for a soft and seamless transition, setting the stage for the rest of your vibrant rainbow look.
Step 3: Build the Rainbow
Now, it’s time to build your rainbow. Apply orange next to the red, blending where the colours meet to create a seamless transition. Follow with yellow, diffusing into the orange. Continue with green, ensuring each colour flows smoothly into the next. Add blue, buffing it into the green, and finish with purple at the outer corner of your eye. Each colour should transition smoothly, creating a beautiful gradient perfect for capturing on Instagram. Take your time to blend, to achieve that flawless, vibrant rainbow effect.
Step 4: Define and Blend
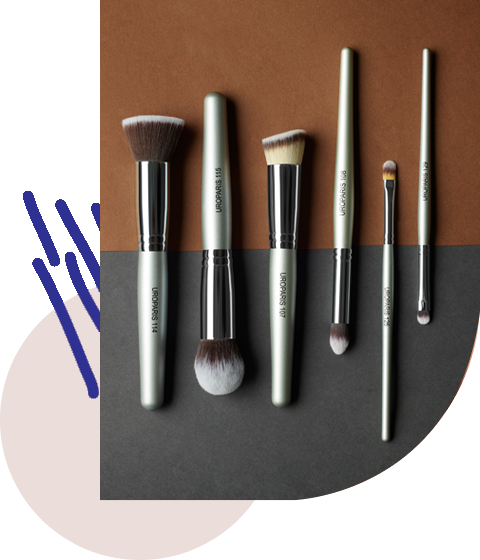
Blending is essential to make your rainbow eyeshadow look flawless. Use a clean Uroparis brush to soften the edges of each colour, ensuring they flow like magic. For precision, the Uroparis 146 smudger brush is perfect for softening and smudging the outlines. Brush no. 142, a detailed round blender brush, is ideal for mixing smaller areas and creating seamless transitions. Uroparis 122, a fluffy blending brush, is your go-to for an overall blend, while the dome-shaped fluffy eyeshadow brush no. 117 is excellent for buffing larger sections. Proper diffusing with these brushes ensures a polished, professional finish, making your vibrant eyeshadow look cohesive and stunning.
Step 5: Add the Finishing Touches
Complete your look with some glitter on the inner corners for a touch of sparkle. Enhance your look even more with a pair of our best-selling Uroparis strip lashes like LV 2 and LV 3. Finish off with a swipe of eyeliner and a coat of mascara. These finishing touches will ensure your rainbow eyeshadow look is sparkly, flawless, and ready to turn heads.
Check out our blog for expert tips on the ‘Do’s and Don’ts’ of wearing strip lashes.
Tips and Tricks:
Here are some tips to keep in mind to enhance and make your look last longer:
Pro Tip 1: Seal the deal with a setting spray to keep your rainbow fresh and fabulous all day. Setting sprays lock in the colours, preventing smudging and fading, so your vibrant rainbow look stays intact from morning to night.
Pro Tip 2: Clean brushes are essential for bright colours. Wash them regularly with our Uroparis Brush Cleaner to prevent muddying your shades. Dirty brushes can mix leftover pigments, dulling the brightness of your eyeshadow.
Now that you’re armed with the know-how, it’s time to rock that rainbow! Unleash your creativity and let your true colours shine. Don’t forget to tag @Uroparis in your stunning Pride looks – we can’t wait to see your creations! Celebrate your unique beauty with confidence and joy.